Friday, March 30, 2007

Using Color Variations in Photoshop CS2

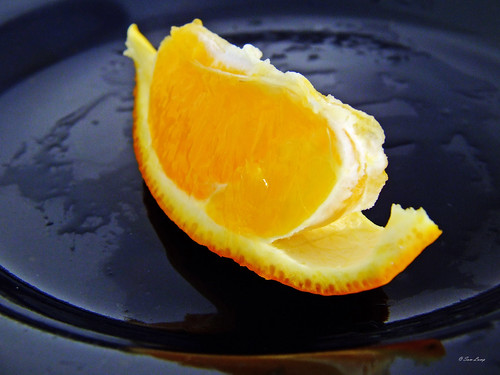
Sorry I haven't posted in a few days but I have been laid up with my back. Although I am going into serious withdrawls from lack of picture taking I have managed to get some photoshop step by steps done for you guys. This is such an easy color fix for your pictures. give it a shot it's simple and easy and it works. I use it all the time.

I love using the color variations tool, really lets me saturate or change the color temperatures easily. I like playing with the cures but I am not good with photoshop yet so I use this feature Here are the steps.

1. Click image in the tool bar at the top of the screen
2. Click Adjustments
3. Click variations
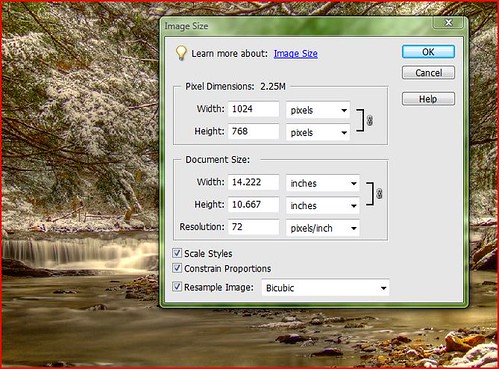
4. Select a tonal range of your image to adjust, alternatively, you can select saturation, or strength of color to change
5.Click and Drag left or perform small adjustments, or right to make large adjustments.
6. To add a color to your image, click one or more of the thumbnails to add the or subtract color as you like.
The results of the adjustments appear in the thumbnail images. To increase the effect click the MORE thumbnail again. To decrease the brightness of the image by clicking DARKER, and to light click LIGHTER
Once you have the picture the way you want click OK
And to reset the picture just click the original image.
Don't forget to save a copy of the original image so your not working with the original just a copy.

Photoshop Elements

Color variations in Photoshop Elements
1. Click on "Enhance" on the top tool bar
2. Click on "Adjust Color"
3. Click on "Color Variations"
From there you can adjust your pictures according to taste and then save when done. And dont forget to work on a COPY of the original.

Thursday, March 22, 2007

Getting Close to Your Subject for the Perfect Picture

Here is the best tip I have ever gotten or given in photography. I learned it early on and it really does make all the difference in the world to any picture. If there is nothing in the picture in the background of the foreground than all the viewer has to focus on and enjoy is your work of art. Even a step or two closer can really draw the viewer into the moment.
This is especially true when taking pictures of people. Just think of the last time you saw a picture of a loved one, you know the one, that picture that just makes you smile when you see it. It not only captures the moment but the face. Whether you are taking pictures of people of places filling the lens with the subject is the best way to go.
Keep in mind however if you are using a digital camera your picture doesn't suffer from "parallax". Whats this you say, "parallax" is simply put viewfinder is not at the same position as the camera's lens. So when you are VERY close say taking a macro and you are using the view finder only what you see is NOT necessarily what you'll get.
Let me tell you a funny story that happened to me when I bought my first digital camera about 15yrs.
I was taking pictures of some flowers in the garden and because I was new to digital or regular photography for that matter I looked through the view finder instead of the LCD. I was maybe a foot away from the flower. I thought all had gone well with the pictures. I loaded them onto my computer and they were all off center! I thought for sure my brand new camera was broken, I even sent it in to be repaired! I had only had it a few months, and could not imagine how it got broken but to me it was broken. Kodak sent it back saying they found nothing wrong with the camera. When I called to talk to some one at Kodak they told me about "parallax". Well I felt stupid but I did learn, from then on when I took a closeup I used my LCD to line up my shots because I new from then on what I saw through he LCD was what would show up on my computer.
LCD's really are the way to go when doing macro or closeup shots.

Monday, March 19, 2007

Youtube and Photography

Youtube is a great resource for photographers, whether your a beginner with little to no experience or a seasoned hobbyist.
Well as you know I love looking for anything photography related. And often I find a video here and there. But someone has posted a series from the DIY network called the "Whole Picture" hosted by Erin Manning she is a professional photographer and her shows are very informative and cover a great range of information from beginner to advanced hobbyist.
I used to watch it every week but I think it has been canceled. Anyway someone was nice enough to post several of the shows on Youtube.
I just finished watching this show called "Digital Photography Lesson - Skin Tones" They are posted in 4 parts and are all listed in order.
This episode covers lighting, metering, and histograms, and exposure. This is really a great show to watch if you are really into portrait photography.

If you want to see more of her show you can go to Youtube and do a search for "photography" You wont believe how much stuff comes up.


Saturday, March 17, 2007

Circuit City Photography Contest

OK Guys, here is an on going monthly contest from Circuit City. This months Photo Contest theme is "weather" So it should be pretty easy to find a great picture to post into there forum.
Yes, to enter you have to post your entry via there online forum. Now I read the rules which are clearly listed except the size of the photo to be submitted. I submitted my winning "Snow Falls" photograph at 1024 x 768 and it took it with no problem.
And the great thing is the prize -
Canon Rebel XTi SLR Camera Kit

* 10.1-megapixel SLR
* 9-point autofocus
* EF-S 18-55mm lens
* 2.5" LCD screen
* Self-cleaning sensor unit

This contest ends March 30th so get going you don't have much time left to get a picture in.
Good Luck!

Thursday, March 15, 2007

Ah Ha! I Did It! I Think! Macro Oranges.

Peeling Slices
Here is just one of a series of of macro pictures I took in my Macro Light Box. I finally figured out with the help of some flickrites how this whole macro thing works.
NO ZOOMING
Thats it! Use the macro lens to make up for not zooming, and of course turn your camera on to the macro setting. I use the +4 macro lens for this shot. As you can see it came out really well. Although I the lighting was a problem, I had to take care of that in post processing. But as you can see it worked out really well.
Plate of Oranges
So I think I found out what I can do on a bad weather day. So this should be fun!

A Few Sites Worth a Visit

Well today as it is rainy and dreary out I though I would post some sites that I often go to some are photography related some aren't. Some are just fun and a perfect waste of time but I think we all deserve to do nothing important or useful at least once a day. So here is my list. I may add to it so you might want to keep an eye on it.

1. Greg's Photo Diary He is a fellow photographer with a great eye. And he is also a personal trainer in London. So if you need a personal trainer/photographer check his site out. Greg Smith's Photography

2. Life Hacker Productivity and software guide is how it is described but I think it goes past that and really gives you some great tips on all kinds of things.

3. Gizmodo the gadget guide. Anyone who knows me knows I am a gadget nut. So join the rest of us nuts here.

4. Tips & Tricks Computer tips and tricks.

5. Digg interesting , fun, unusual, off beat, and addicting.

6. DPChallenge I know this is the site I just talked about. Yes you have to be a paying member to enter almost all of the contest. But the photography and the free tutorials make it worth a free registration. And it is only $25.00 a year. Same as Flickr

7. YouTube well what else is there to say. Videos of everything.

8. Vazaar A unique invitation only site with some fantastic photography. I was lucky to be invited. If your interested let me know I have only a few invitations left.

9. Ev Llyod Photography As he says he is a great blok, and a fantastic photographer. His photographs are just amazing!

10. PC Photo Magazine Yes, they have great articles, and how to's but they also have a sweepstakes each month and give away some pretty amazing things. I actually won once. They didn't even notify me. Just sent me a 15 minute battery charger with batteries worth $50.00! So if nothing else enter the sweepstakes everyday.

11. My Instantwin now this is great place to win all kinds of things from ipods to bakery supplies. This person list all the instant win games on the internet right here. They are free games from name brand companies. And you can enter easily, especially if you have a form filler like google or something. Yes, I have won and lost of times. I have won $100 and an ipod nano just to name a few. So go it's free.

12. All Day Long I Dream About Photography Well what else is there to say, except the dreams are great and so is the advice. You might alos check out the Flickr Group. Tons of info and stuff to do on both sites.

Wednesday, March 14, 2007

Free 7 Day Photoshop Video Course

Ok here's the deal you go to this site
Sign up for the free course. And in a few days you'll get an email to fill out a survey about photography and you will also get a free PDF book on photoshop. The pdf book is great. Full of lots of illustrations and step by step instructions. Which frankly I prefer. I can get lost pretty easily because I tend to skim through. The video course is very informative. I have only received the first video and it is only 4:47 minutes.
I think if nothing else it's free and the book is a great help.
Anybody have any ideas on photography block? The weather here is just weird last week it was freezing out this week we have 50's outside and this weekend we are looking at snow for the whole week! So going out to take pictures is a hit or miss thing. I have my macro box but I having a problem with the lighting. I haven't gotten the clip on lights yet, and I am not sure I like the blue background to the macro box. So I will be covering it with poster board.
I'll post some pictures with the new background tomorrow.

Sunday, March 11, 2007

Photo Challenge

I belong to DPChallenge but only as a free member. I often get newsletters from them about challenges. And today I received one about a "Speed Challenge" you have 24 hours to complete the challenge and post your photo. Not thinking I needed to be a paying member I got together everything I needed for the theme:Time I am assuming it was in honor of the daylight savings time change.
Well I took my pictures and here are two of them. The 1st one was the one I was going to post.

It's All About Time

Keeping Time

So what do you think? Is it a winner or what? :)

The Worlds 1st Photographs - These are Cool

These are the 1st photographs ever taken ~

Taken 1826 through a window at Le Gras
Not quite sure what it is but it is the 1st.


The 1st color photograph


1st Aerial Photograph ~ This is Boston encase you couldn't recognize it! LOL


1st Underwater Photograph, makes me wonder who took the photo. :)


And I've already shown you the most expensive photograph in the world.

So if you get to feeling a bit depressed that no one understands your art just take a gander at these and I guarantee you'll feel better. We all had to start somewhere.

Thursday, March 08, 2007

$3.3 Million Photograph


Yup, thats right. Some rich guy paid $3.3 million dollars for a photograph. Now I am not an art critic or even a great photographer. I am just a regular person who loves photography. But somehow in my head when I here someone paid that kind of money for a photograph I would have thought it was of something like the Loch Ness Monster or Big Foot or something equally as amazing.
But no they paid for a picture of what looks like a grocery story!
Mind you I wouldn't be complaining to at all if that were my photograph, but wow! Thats just unreal.
Check out the Article and let me know what you think, really I want to know.

Wednesday, March 07, 2007

How to Resize Your Photograph

Often when entering a photo contest there are size restrictions. So I thought I would post a quick tutorial on how to do that. This tutorial should work for most image editing software, as long as you know were to look.
image resize
1. Image Menu > Image Size
When the Image Size window opens, change the resolution to 72 if necessary. It is important to do this first.

2. Next, change the Pixel width dimension to 600. It is not necessary to change other settings. When Constrain Proportions remains selected the image will retain it's aspect ratio (The aspect ratio is the ratio of the width of the image to the height of the image. For most television images the current aspect ratio is 4:3. HDTV uses an aspect ratio of 16:9. The aspect ratio, along with the number of vertical scan lines that make up the image, determine the sample rate used to digitize the video signal). Also make sure Resample (The process of reducing image data set size by representing a group of pixels with a single pixel. Thus, pixel count is lowered, individual pixel size is increased, and overall image geographic extent is retained. Resampled images are "coarse" and have less information than the images from which they are taken.) Image is ticked.

3. Click on the OK button.

4. File menu > Save for the Web

Most image programs are generally the same so you shouldn't have to much of a problem finding the the image resizing menu.

Tuesday, March 06, 2007

DIY - Do It Yourself Photography

Well of course photography is do it yourself. But did you know there are easy fixes for lots of photography problems. Such as using a car windshield reflector as a light reflector. Especially if you get the two side ones. One side being gold the other being silver. The gold side is great for portraits giving that nice warm glow and the silver side is great to optimize your lighting. The best thing is you can usually pick on of these up for less than $10.00! Much better than $30.00 or more for specialty ones.

Need a holder for that reflector try HERE Nothing like a little ingenuity and home depot to get things done.

Heres another Macro Light Box made even cheaper than the one I showed previously. I spent $10.00 on my box not counting the lighting. This box is made of card board and poster board, which you can get at the dollar store.

Need a studio back drop and don't have much money try using some pvc pipe to make a stand and use Velcro strips to attach different color and patterns of sheets you can pick up at walmart. Want to make it look even more professional? Remember tie dying, get yourself some muslin or a white sheet, a bucket, some string and some dye and have fun. You could make several different colors for any portrait situation.

Heres one of my favorites a Mini Flash Bouncer great for amplifying your flash.

Heres directions on how to make your own Soft Box. Something would normally cost a few hundred dollars! Great for reducing harsh shadows.

Need to Soft Flash Diffuser try cutting out a piece of paper and taping it over the flash, it will cut down on the harsh shadows and light. You could also use a piece of silk.

Looking to add some color to your pictures. Try taking colored CD jewel cases and use them as jells like red, blue, and green. Yes it really does work, just make sure they are scratched. You can pick them up very cheaply.

How about a lens hood? Gotta have that right? Try a Printable Foldable Lens Hood

Well that should keep you busy for a while. I'll post more next week.

JPG Magazine

Everyone knows I am a HUGE Flickr so it should be no surprise that I have found JPG Magazine
To quote from there site:
"PG seeks engaging articles of all types for the magazine. JPG stories are personal, funny, and encouraging. They are not technical, boring, or snobby.

Remember that JPG Magazine is all about the love of photography, not the technique. We're not an instruction manual - we're a love letter.

The best way to know how to write for JPG is to read JPG! So be sure to pick up a copy or download the PDF and read it cover to cover. That'll tell you all you need to know."

Now I haven't yet submitted any photos or stories yet but I expect to do so by this weekend. I think I am a fair writer and I pretty sure my photos are acceptable so I think I'll give it a try.

Now if your photo gets published you get $100.00. But it doesn't say if you get paid for story submissions. I have looked but I can't seem to find out.
Stop by there and take a look around this is not your typical photo magazine. These are pictures taken by everyday photographers, some great some not so great. But what is it they say beauty is in the eye of the beholder.

The size requirement has me a bit worried however. The photos being submitted must be at least 2200 pixels. The bigger the better they say so make sure you check the size of your photos before uploading.

Sunday, March 04, 2007

Multinomah Falls in Oregon

OK I Hunted and Hunted and I finally found it!

Video: Multinomah falls
Wow I wish I had taken a picture of this waterfall! Amazing, I used to live in Washington State when I was young but never went there.
Beautiful, amazing, awe inspiring.

How To Make Money Through Photography

Here is an interesting and informative article on stock photography. I dabble in stock photography, through Fotila myself. Although I haven't had much of a chance to pursue stock photography that much for a number of reasons.
1. Space, my old apartment was very small, now that I have a much bigger place I have made my macro light box.
2. I am still learning the art of photography.

However this article is very open and honest about what it takes to make a living selling photographs for something other than art.
Make Money With Your Camera

If you think you have what it takes go for it I say. I have sold several photographs and it's fun if you go in with little to no expectations of fame and fortune right off.
I haven't yet set aside time on a regular basis to take "stock photos" I generally just upload what I think they are looking for after a certain shoot.

As many of you are aware I am a foremost a nature photographer, and there is little call for that in stock photography.

Keep in mind if you do decide to do it most of these micro sites have a "wish list" and potential clients request certain types of images and that is a great way to start, look there and see what the market is looking for. It will help give you some direction to start in.

Theres a Photography Link for Everything

Snowy Night Lights
I took this last night during a snow squall.
Line of Trees
This was taken earlier.

Today I was going to reshoot my macro shots with some updated info to see if I could get some pictures that came out better. But I have have received my first snow injury in years. LOL I hurt my thumb on my right hand. right now I am typing very slowly.
Anyway I thought I would at least put up this link called Everything Photographic Basically it's one stop shopping on all thing photography. From tutorials to photographers, a-z its there. Enjoy

Saturday, March 03, 2007

My Misadventure with My New Macro Lightbox

Today I finally found enough time to get my new Macro Light Box out and play a bit. Since I haven't tried my new macro lens I got for Christmas I was all excited. I decided to use four vintage cat figurines as my subjects.
So I cleaned them up, * note when taking macro shots REALLY make sure your subjects are CLEAN as my figurines are delicate and a bit intricate I should have used an old toothbrush to clean them much better than a damp paper towel, which left some lint.
Anyway back to my story, I got everything all set up, the lighting looked great and I had my tripod and lens all cleaned and set to go.
I first tried the #1 lens and had my camera set on macro and I was using the manual mode. Also I had set the white balance correctly. I thought HDR might be fun to try so I took several pictures of the silver Persian.
macro 011 *note disregard the dust :)
As you can see it seems a bit blurry or out of focus. I know it is not from camera shake as I was using a tripod. While taking the picture it looked in focus to me.
But not up close. This basically happed to most of my photographs. I tried each of the lens both on and off of the macro setting, and got the same types of results. I even tried all three!
macro 021
This one I think came out the worst.

Here are a couple of the HDR versions I did.
cat2
I think this one came out the best.
The Persian just plan looks bad.
Generated HDR - Tone mapped.
If you want to see the whole set Go to Macro Light Box Set

Now if anyone out there has any ideas or knows of an article to help me out I would love to hear from you, PLEASE!