Thursday, April 26, 2007

My Financial Plan to Buy a New Camera

As you have read I want to buy a new camera. So I have made a plan of attack as it where and I thought I would share it with you.
photomount-cards-001
These are Photo Mount Greeting Cards. They are made by Strathmore Artist Paper They are blank greeting cards that I have mounted 4 x6's on.
photomount-cards-003
As you can see they are embossed and have a nice envelope. I bought them from eBay so I couldn't say what the retail price is, however I paid $20 for two packages of 50. Which I think is a great deal. I haven't decided on a price yet, but I think $3.99 would be good. I plan to take them to some of the stores around town, as they are local pictures and either sell them to the store or put them there on consignment.
I used the money that I won from Shutterfly to purchase the prints. And let me just say the quality is excellent.
You can also purchase photo frame greeting cards from Photographers Edge this is a great company. I really love there cards, they a very popular with professional photographers, and when you send for there free catalog you get 3 free sample cards that you can use. I will be purchasing from them as soon as I sell these.
I received
Also I have signed up for a couple of affiliate programs. For those of you that don't know what that I'll try and explain.
Basically it is being paid for referring people to a certain site like Shutterfly. If you were to click on a link to Shutterfly and then placed an order Shutterfly will pay me for the referral.
I don't want to clutter the site with tons of ads so I will sprinkle them in here and there. I prefer the text type links instead of big gaudy banners. So if you do see them and you find you are interested in the site please click on it. The money I earn will go to purchasing my new camera equipment.

Buying a New Camera

Well I have decided to by a new camera. I have been doing a lot of research trying to pick out a camera I want. I have decided to go with the Canon Rebel XTi/400d I think the lens kit is my best choice, although I have heard some good things and a lot of bad things about it I still think for the price it's best to get it just encase. But I want to add the Sigma 10mm-20mm lens. This is an expensive piece of glass, the cheapest I have seen NEW is $449.00. But I think I will probably buy a used one off of eBay
And of course the Canon 50mm aka the Nifty-Fifty
EF 50mm f/1.8 II. This is the cheaper of the three 50mm that canon offers. It has rave reviews from most everybody. It runs around $80.00. If I can find the other 50mm (EF 50mm f/1.4 USM) for a reasonable price, most likely used, I will get it.
Well thats the basics of what I need, but of course you have to have an extra battery at about $50, at least a 2gb compactflash card at about $40, and then throw in a new camera bag, the camera bag I have only holds my camera. I need something to hold the camera, the lenses, memory, and filters. Can't forget the filters. As we all know taking waterfall pictures requires a set of ND (neutral Density) filter and a Circular Polarizer, and a UV filter. Those will run about $100 used. Now the camera bag I have picked is called the Sling Shot 200w this is such a great photography equipment bag. I know I could have said camera bag but honestly once you look at it you'll see it does so much more than hold a camera and for $99 it's a great deal.
So there you have my wish list. I figure this will run me anywhere from $1200-$1500. Now all I have to do is get the money. Thats the next step.

Tuesday, April 24, 2007

Pond View Farm Falls


I found this waterfall on accident (as with most of my falls) This one was on the side of the road, and looking down at it is was huge. It sits on an old farm called "Pond View Farm" The pond is no longer visible as the natural dam that was there feel over during heavy rains one year.
I always try and ask permission to go on to someones property and take pictures. Fortunately the lady that owned the place Anne Hoag was standing over the falls .
Apparently there are two falls one further down a trail. Which I plan on exploring just as soon as I am feeling more capable.
The farm is located in Hoosick NY.

When I asked the lady if the falls had a name she said no, and so I told her we would call it Hoag Falls. But as Michel and I where on our way down to the falls shouted out that they used to call the farm "Pond View Farm" So I decided it was the best thing to call it.
I asked if many people had taken pictures of it and she said yes, but no one has ever asked her permission.
Some how I just think that is wrong, the least anyone can do is ask permission. I also offered her a nice print for allowing us to come on to her property. She said no on had ever done that before either.
Well needless to say I will be back, although the farm and the people who own it are old, the place has a beauty and rustic appeal that is hard to beat.

Although this isn't my best shot of a waterfall it certainly was my most surprising. I think once I get the use of my arm back (100%) I will be able to do a better job. It really is hard when you can't squat, bend, or reach. All from different aliments.
I should know tomorrow whether I will be in a cast or not. I guess you have to wait a week or so for the swelling to go down for some injuries. I can use my arm for the most part, but lifting is out, and I can't straighten it all the way, and forget about reaching to scratch my nose or something! LOL
The knee is a bit better it only bothers me as much as it did before. As long as I don't touch it. But my shoulder is pretty stiff and painful, along with my back. But hey that always hurts. But I am sure falling down a hill didn't help it any! LOL

Sunday, April 22, 2007

Win a Digital Photo Frame!


Ok this contest does not require any photographs to be taken or submitted. Finally a contest that doesn't require artistic talent, just luck. So here is what you do Go to this site: 5 Minutes For Mom Second you have to follow there directions, and sign "Mr Linky" Found at the bottom of the screen. You'll need to enter your name and web address. And don't forget to add a link to Philip's Digital Photo Frame
This is a really cool frame it does all kinds of stuff so check it out and sign up for it.

Saturday, April 21, 2007

Breaking News!

I guess the title should be "Thank God I didn't break anything!" :) Seriously though, I went to photograph a well known swimming hole that I had heard about but was told the owner often shoots at anyone on the property! So of course I kept my distance! Well an avid follower of my work grew up here in Bennington and gave me directions along with the "urban legend" of people being shot. I guess living in Bennington you can't call it an "Urban" anything. LOL Will call it the "rural legend" Well being an early riser I, liked the morning light, I couldn't get anyone to traps off into the woods with me. So I headed out alone reassuring Deb I would be fine. Sealing my fate.
The Swimming hole I was told wasn't that far off the road and would only take about 10 minutes or so to get to. Well as you know we have had lots of rain here in the northeast. I figured the tubs, both upper and lower would be a great with over flowing water. Well the ground was pretty wet in certain spots but the hike was not bad.
I even had my camera around my neck just encase I encountered any wildlife or something else equally wonderful.
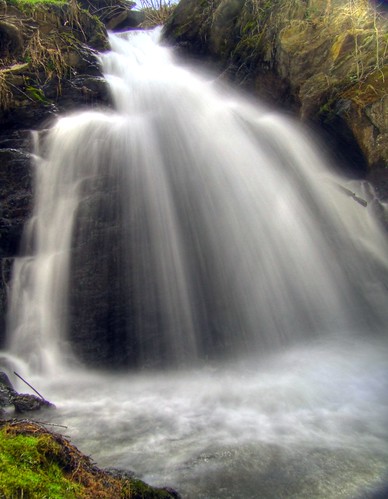
Well I got all the way to the falls, actually saw them for about 2 minutes before well it goes something like this....

There was a ditch, where the water from the rain had run down, there was no water now just mud, and a log that a beaver had gnawed down. The mud was thick and gray and I couldn't get a good push off to step over the 3' ditch. So I saw the gnawed tree. I kicked it several times to see if it would move, of course it didn't so I put my foot on it to push off to get to the otherside when it gave way. Down I went, catching my self with my left hand straight down. Did you know that elbows don't have springs? Yea' I know but hey it's my elbow! LOL
My camera landed in the mud, nothing broken there, thank god! I had the lens cap on along with the circular polarizer so even if I hadn't had the lens cap on the camera lens would have been safe from the mud.
Ok back to my fall, I also twisted my knee. So both my left knee and my left arm were hurting pretty badly. I was sitting in the mud and I had my back pack.
Back Pack Contents: tripod, batteries, charger, filters, camera case, pocket knife, flashlight, candy bar, drink, gloves, and of course my ipod nano, my foto chute hard drive ( i love that thing) and of course my medications, (mostly pain medications for all my aches and pains). As you can see I like to bring some essentials when out in the woods. You never know right?
OK I figured I was about 400yards from my truck and the walk was going to be painful. I had already acquired a walking stick which I used to get myself up and then headed back to the truck. I couldn't take the same route back as it would have been harder on my injuries. so I took the easier route, but it took me longer, and I still ended up with some obstacles to climb over, as I wasn't to familiar with the territory.
So the long painful walk started, seems like every bend I should have seen the truck but NOOOO the truck was no where to be seen. Well I made it back to the truck, and climbed in. Now you would think I would have taken the pain meds when I fell but I really thought that I broke my arm and if I need any medical attention taking anything would have be a bad idea. So I drank some water and drove hoping my cell phone would pick up a signal. Within 5 minutes I was in pownal center and I stopped at the Fire station, thank god there were people there ( we have a volunteer fire department in this area, so the chances of anyone being there were slim. I pulled in and thankfully a lady was pulling in behind my I parked in her way to get her attention, by now I was hurting pretty badly, and I hadn't cried one tear because I was trying to hold myself together to get help, but once I found it I just let go.
They called the rescue squad and I was soon off to the hospital.
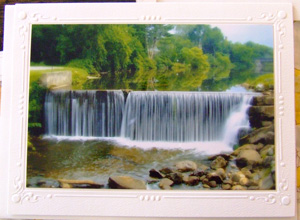
No I didn't get any pictures, I didn't break anything, and yes I am going back as soon as I can.
There is no moral really, just to say I was very lucky, and of course I had to make a deal with Deb before I can go out in the woods again.
But let me say this, I don't usually go off into the woods alone, and I wouldn't have done so just to explore, I went knowing where I was going and knew I wasn't too far from the truck.
So remember be safe when your off on your photographic adventures, and try to always bring the necessary stuff just encase. Oh and cell phones are only as good as the reception you get! LOL
OK the next post will likely be me with the waterfall by the end of the week, if I am luck.

Wednesday, April 18, 2007

Clic & Print Photograph Contest

Clic & Print is having a photograph contest. 1st prize is a Canon Rebel XTi 400D lens kit with a 4gb compact flash card + 2 x 1.5m "visual" of your choice on stretched frame.
There is no theme or size requirements. Basically you upload three, yes three, of your best shots, they have to be at least 3 megapixels, so make sure you save them with at least a 200 or 300 dpi and you should save them as a png so there is less compression of the image. The contest runs until April 30, 2007 and there are 10 prizes all together. Only one 1st prize though.
Clic & Print works with flickr so you can drag and drop any of your flickr images in there shopping cart and get them printed easily. For us US residents you might want to pay attention to the shipping as it is based in France.
Good Luck!

Tuesday, April 17, 2007

Making an HDR Panoramic Photograph

This is Whimsy Farms, in Arlington Vermont. I took it last year after getting my new camera. But by the time I reached this place I had been out all morning. And I was pretty tired. And with my back and hip hurting I just couldn't get out. But being an avid photographer I knew I needed to get the shot. So I grabbed my tripod rolled the window down in the truck (if I was in my grand am I think it would have been much harder!)
This image is an HDR (High Dynamic Range) and a Panoramic image. Now doing this is easier than you think. We have been over how you produce an HDR image.
Step 1. Set your tripod up (in or out of vehicle)
Step 2. Look at the subject and in your mind slice it in 1/3's. Each 1/3 will be a series of bracketed shots, just like making any HDR image.
Step 3. Take your shots and remember when turning your tripod to make sure there is some over laping in the picture so that when you stitch it together later it will line up correctly.
Step 6. Load your HDR software and make your hdr images. I took nine. 3 for each section.
Step 5. Step four upload your photos into your panoramic software, photoshop elements and photoshop include this feature.
Step 6. Stitch your 3 or more images together.
Step 7. Crop if need, I had to crop out the truck mirror and window and door frame.
Thats it.

As always I am looking for photograph contest to enter. And this photograph was just entered into Fuelmyblog View From My Window Contest So if you have a great out my window picture send it in the prize is a camera! So go for it.

Monday, April 16, 2007

Camera Tossing or A.K.A. Camera Gone Wild


This is what people in Vermont do during a nor'ester.
Granted this is not for the faint of heart, I had to stand over my bed to do it and tossing it the first time took me a few minutes. But once I figured out the trick it was quite fun. Because we were standing over the bed setting it on a timer didn't work and we couldn't throw it to high for fear of hitting the ceiling. So after the first dozen we just open the shutter and waved the camera around wildly.
So I guess the set should read Camera Toss and Camera Gone Wild Set. LOL

I WON! Again!

Yes, I won again. This time I won something that is kind of photography related. I won a 22" flat panel monitor from a Dell instantwin game. I am giving it to my wife as an anniversary present. I think it will take up most of her small desk! LOL Oh and I also won a webcam last week too. If you want to join in on the fun click on myinstantwin It's free and it is a lot of fun.
Win Free Prizes

Online Portfolios and How to Create Them Easily

Wow! Such much has been happening lately! I have so much to share with everyone. First off as the title suggest I am putting together an online portfolio. For me I wanted something simple and easy. Even though I design web pages. putting together a real fancy portfolio can be very time consuming. Just getting all your pictures together and inserting all the meta tag information and your copyright stuff. It really would be nice to have an easy to use simple format just to put all of your best work online for everyone to admire. And hopefully buy!
Well I found one really simple way. For any one that has Photoshop CS2 you already have a built in solution, Adobe Bridge. Now before I go into the steps lets talk about a few other things. Yes there are websites that you can pay to upload and host your portfolio;s. I don't have tons of money sitting around doing nothing. And since my photography isn't paying for it self yet. I have to think in term of FREE. Yes we all know how much I love that word FREE. Say it a few times and it makes you feel really good. :)
So you have to think about hosting your portfolio. Well if your a computer whiz you can host it from your own machine. However most people aren't into all that so I have a better solution. Most likely your paying At least $40.00 for your online service. With that comes at least 10mb of space free just sitting there for you to use. So I say use it. Now 10mb isn't a huge amount but think of it this in terms of quality photographs. This is the place where you want to put your best stuff up. Even if it's 20 of your best photographs and a contact page you have a face on the web for people to go to check out your work. Now if your lie me you have a flickr site, most of us do. It's fun and easy but not very professional looking, however you can link to your pictures from there to your portfolio. But thats another lesson.

OK I am still working on my portfolio so I will post it as soon as I get it done. But in the mean you work on yours. Here are the steps.

Step 1. Make a folder with all of your best work, and I mean your very best work.
Step 2. Open Adobe Bridge Browser
Step 3. Open up the folder you made with your photographs in them.
Step 4. Now heres where a lot of the time consuming part comes in. Click on each of your pictures and on the left you will see your Meta Data information. Fill our all the information you want to especially the copyright information I put in "Sam Lamp" and the "Rights Usage Terms" I just put in "All Rights Reserved". As you can see if you have a lot of pictures you could be there for a while.
***Keep in mind you can host your portfolio at places like Godaddy for less than $.00 a month and then you can get your on Domain Name. But will leave those lessons for another time also.
Step 5. Got to Tools > Photoshop > Web Gallery then choose automate.
Step 6. Select the style you like
Step 7. You can see a preview to the right. Enter your email address so that people can contact you. Take a look at the Source Images section. This is where you choose the images and decide where you will save the gallery.
Step 8. Use either Folder: Select an entire folder of images to be processed or Selected Images From File Browser. Use this option only selected images. You will have to select the images before opening the Web Photo Gallery dialog box. Hold down control and click on each desired thumbnail to select it. Click on Destination and either create or select a folder to save the gallery into.
Step 8. Under options, you will see a drop down menu. Choose Banner. This is where you will enter the title of the gallery and personal information. You can leave the rest set at default if you wish.
Step 9. Choose your compression setting. This is a really important step especially if you are working with a small amount of web space. You don't want it to compress so much that it makes the picture look lousy, but you don't want a huge image that takes up to much space on the website, or take to much time to load. Keep in mind you are only trying to show off your work, not allow people to print your work at for there use. I would say an image around 600 X 800 would be the right size or smaller.
Step 10. Security Settings this is where you can watermark your image so no one will use.
Step 11. Photoshop will do the work for you just click "OK" when your done. Now you can sit back and relax while it processes everything. You don't even have to resize any of your images first, Photoshop does it all for you. All the thumbnails, HTML and Java script will be built for you.

Your web browser will launch when it is finished.

You can scroll through the thumbnails and click on any of them to display the full size image. This is a quick way for viewers to locate the desired images quickly. Notice that the watermark can be clearly seen.

Step 12. the final step is uploading it to the web. Whether you decide to use your free space from your ISP or purchase hosting you will need the ftp address, your username, and password. You will also need an ftp program such as Cuteftp You can get free trial version from them. I have verizon as my ISP and it offers a web based ftp service which requires the same information. Even windows 98/xp and I believe Vista also have FTP capability. Basically you open up a folder and in the address bar type in the ftp address from your hosting services hit enter and a box will pop up prompting you for your user name and password. Just type those in. Once your logged on just drag and drop your gallery folder into the window and wait until it opens up.

Thats it! All done. The hard part is doing all the information input. The rest is just a few clicks and your on your way.
If you have any questions please email me and I'll see if I ca help.
And don't forget to give me your portfolio address so I can check it out and post it here on this site.

Wednesday, April 11, 2007

I WON!

Ok this has nothing to do with photography, just that I won $300.00 from Winzy.com. I won there monthly sweepstakes. I had my choice of an Xbox 360 Core System or $300.00 in cash or $300.00 Amazon gift certificate. Well I picked the cash of course. I figured I have a playstation. So getting an Xbox would mean I would have to buy all new games.
So I am putting it towards heating fuel. As we all know that is very expensive these days.
I will say if you sign up to be my friend through winzy you win whatever your friend wins, except the monthly sweepstakes. They have instantwins for gift certificates, ipods and lots of other stuff. So if I won an ipod instantly so would and the rest of my friends. Cool huh. It's free and all you have to do is use it as a search engine once in a while. And the nice thing is you actually win! OK enough self promoting on with photography.
I know I promised you all I would post my directions for making a monopod but I have to test it in the field first to make sure it works well. And I need to get a wing nut type screw so I can have it swivel without using a screw driver. So stay tuned I promise it's worth it.

Win Free Prizes

Tuesday, April 10, 2007

50 Fast Digital Camera Tips

So I found a couple of freebies on the Canon website, Photoworkshop. And no it's not a camera! :) I wish it were but at least these freebies are good ones. The first on is 50 Fast Digital Camera Tips. You'll need a PDF reader you can get one from adobe for free. Or you can get the Foxit pdf reader which is also free. I prefer the Foxit reader for two reasons on it's free and two it is extremely fast. It doesn't take a minutes to load and it does exactly the same thing.
The other one is Digital Photography Top 100 Simplified tips & Tricks. Keep in mind I haven't read them yet, but if Canon is putting it on there site it must be pretty good.

Monday, April 09, 2007

Finding the Right SLR Lens for your Digital SLR Camera

I know I don't have a Digital SLR camera. But I figured I should read up on it just encase I win one or I win the lottery. So I got to looking at them and all the numbers and and styles and mounts. What does it all mean? Well I started reading up on it and it is well very technical and very interesting too.
I found an article which makes for easy understanding of all of those numbers and letters, the mounts, the style. You name it and it's covered. So if your interested I suggest reading this article it's worth the 20 minutes.
Find your lens in 6 steps

Saturday, April 07, 2007

7 Steps to a Sharper Image

OK as most of you know I struggle on a daily basis to keep my camera steady. I hate that my hands shake, thus making the camera shake, and thus making me mad! LOL
So I was reading The Outdoor Photographer Online and came across this article which I found really useful. 7 Steps to a Sharper Image. I practice on a daily basis on holding my camera correctly. But to no avail I just can't get it right.
But practice makes perfect I suppose.

Performance Art

Yesterday I spent the morning at MASS MoCa. It's a modern art museum. Which I can honestly say I am not a huge fan of. However My brother Michel (He is doing a 365 project, check it out) and I went there to see if they had anything fun to photograph. Well they did. Check out my Flickr site for all the pictures.

Here is a picture of the most exciting heart stopping thing we saw.
Performance Art
Yes it's a broken television. Why is it so exciting you ask? Well you see they were putting up a new display and Michel was taking pictures of them, I had my back to them taking pictures of the spaceship.
spaceship Suddenly I heard this tremendous THUD
behind me. I turned to find Michel and everyone was staring at this huge TV on the floor! Michel said he saw it getting ready to fall, had his camera on an ready, as he was taking pictures of the workers, he watched it fall, and didn't even try and get a shot! Even after it fell he didn't get a shot of it. He said he was just standing and couldn't take move! Like a deer caught in headlights! I told him it is a good thing he is not a photojournalist! LOL

Practice your Photography Techniques Using Nothing But Your Computer

Sounds a bit odd I grant you. But this site is well worth the visit for those of us who have a hard time grasping the aperture and shutter settings. It's called Shutter Bee You have to have java installed on your system and if you have an adblocker that blocks java you might want to turn it off.
Basically it has an interactive camera that allows you to take pictures in different settings. You change the camera settings on the fly and click "snap" and it shows you instantly what the picture would look like if it were an actual camera.
I found myself sitting there for an hour just testing different apertures and shutter speeds trying to get the shots I wanted. It is great practice and fun.
There is plenty of information there too explaining the different aspects of photography. All noobs should definately check it out, even if your a little rusty it is worth the time to practice. And who couldn't use a little practice? :)

Thursday, April 05, 2007

Turning Your Favorite Photographs into Works of Art

Really! In 5 or 6 steps. This is any easy one guys. First off pick a photograph you would like to look like a sketch. I love sketches frankly, a few years back Deb & I were in Maine and we were at the boardwalk and an artist was doing sketches, and we paid $80.00 I think for this great work of art of the two of us. We have it still.

Well I found a tutorial that can turn a photograph into a sketch and it looks pretty amazing.
Heres what I started with.
vermonts painted trees
I applied these really easy to follow instructions.

1. Open up the photograph you want to convert.
2. Duplicate the background layer and set it blending option to “Color Dodge”
Start by copying your background layer, you can do that by dragging the background layer and dropping it at the “create a new layer” button as shown below. Now change the blending mode of the just created layer to “Color Dodge” as shown
3. Invert the newly created layer
Make sure that the “Background Layer copy” layer is selected and press CTRL+I to invert it. You should now have a completely (or almost) white picture. Don’t worry about that for now.
4. Apply the minimum filter
With “Background copy” layer still selected go to filter -> Other -> Minimum
The radius to select will depend on both your image resolution or content.
A smaller radius will make it look like more “sketch” a bigger one more “realistic” tweak that to your liking. I applied a radius between 2 and 5.
5. Add a Levels layer and set blending to multiply
Create a new levels adjustment layer, if you want experiment by moving the 3 arrows and till you find what you like best. If you like the picture as it is just click ok but DO create the layer in all cases. Now change the blending mode of the levels layer to multiply and you’re done.

This is what I came up with at this point. This took me all of maybe 5 minutes.

vermonts-painted-trees sketches

6. (Optional) Tone your sketch
I did say 4 steps but this one is optional, if you don’t want your sketch to be colored but rather toned or black and white, add a hue and saturation adjustment layer, make sure to click on “colorize” and tweak the hue and saturation to your liking.

This is what you come up with after this step.

vermonts-painted-trees-sketch-tone.

Frankly I like the color version best. But I guess it depends on the photograph.

Still haven't gotten to the monopod yet. Half way there and I am just waiting to make it to the hardware store. Hoepfully tomorrow.

Sunday, April 01, 2007

Light is Everything in Photography

Photography is catching the essence of light on film or digital sensor :) Photographing light is one of the most important aspects of photography. THE most important I would say. Because without light, highlights and shadows your photograph has no depth or texture.
Understanding how light works and how best to capture it is the most important tool a photographer can have. Getting your exposure right from the start is best, because no amount of photoshopping can replace what wasn't captured to begin with.
All camera's are different and understanding how to use the manual mode is something we should all strive for. I know it is difficult for me. My camera is aFujifilm Finepix S5200. This is such a great camera for a beginner! It has all the basic modes and of course manual mode for the advanced user.
When I switch to "m" (manual mode) my lcd gives me a light bar at the bottom right corner. By moving the navigation buttons up or down it allows me to change the exposure setting so that I can adjust for the amount of light I want in my photograph. Basically there is a small arrow that moves from left to right as you change the shutter speed or aperture.
The trick is to change the shutter speed and aperture to get the right exposure. Now there are lots of tables and converters out there that anyone can find for your camera and lens to help you make the calculations easier. But with digital cameras most of the work is done for you.
This may sound easy, just move the arrow to the middle and snap the picture. However as you play with this, and I suggest you do. You will see that in many cases where it is not needed, you've opened your shutter speed for several seconds in some cases. So what you should do is close your aperture.
I found a few great articles which I think will help explain a lot of this much better than I can.
1. Photo.net Exposure
2. Aperture And Shutter Speed - How They Work Together
Both make great reading! hehehe And I have gone bck to them both a few times for a reread so book make them.
And by all means take the free class if you haven't already

Jodie Coston's Free Basic Photography Course
Keep in mind the course is no longer active but the material is the same and I believe some people still post to the forum.

And just to let you guys know I have been struggling with severe back pain as of late so I haven't written much but I am starting to catch up on things and hope to be out and about taking pictures.

I have managed to start a DIY photography project today and hope to have it completed by the end of the week. It doesn't take long but with my back it will be a few days before I can go to the hardware store and get the right piece I need. But believe me it is well worth the wait and something every photographer needs and wants! So look for the directions this week.

If anyone has any DIY projects they would like to have published shoot me an email and I put it up.